 |
 |
 |
 |
 |
 |
 |
 |
 |
 |
The wedding of Kaz and Ilsu
As soon as we finished our visit to Sokkuram we drove around to the west side of Mount Tohamsan to see the temple of Bulguksa. Bulguksa was a truly remarkable example of Silla stability and prosperity when it was first constructed in 528 AD. New additions were constructed during renovations starting in 751. I understand there have been many reconstructions over the years due to war and Buddhist oppression. The Japanese burned it to the ground in 1593 however; the original stone work is still present and can be seen in its latest incarnation.
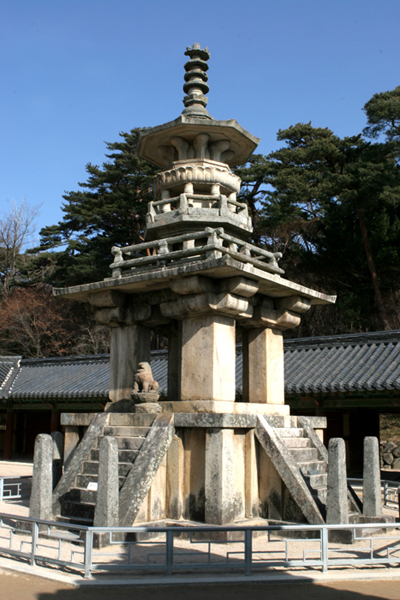
When we first started walking up the hill to the gate at Bulguksa, I noticed the field had quite a few topes scattered about. The picture below is of one such tope/pagoda that I found particularly interesting due to it being unique to my experience. I am fascinated with the variety of structure among topes pagodas and stupas. There is a certain mystic that I have trouble describing yet it is possible that the enigma is due to some sort of subconscious symbology that exudes from these things. I know I am sounding a bit new-agey with this nebulous diatribe however, I think that there are forms with corresponding meaning that we are taught entirely by experience. That is we experience certain sensual i.e. verbal visual aural tactile olfactory events that have corresponding meaning and we can be totally unaware that we have stored this meaning in our memory.
Therefore certain forms may bring these concepts or feeling back into our conscious thought. --- Bottom line is that I am fascinated with these Korean topes. There are a couple of topes visible in the image below however; I am interested primarily with the one in the foreground of the picture for I find it quite unique.
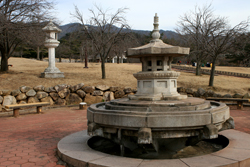 Image 1 -not on map
While I am on the topic of Korean objects that fascinate me, I must mention that I love the variety in size shape and structure of the gates to all the important temples or holy lands. The gate to Bulguksa is no exception since it is a mystic portal housing the four heavenly Kings to which you must pass through to approach the temple Bulguksa. The photo below is of the gate as we approach and the following two pictures show the gate deities.
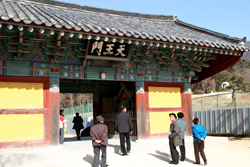 Image 2 -click here for map
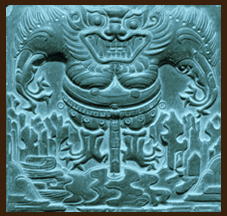
The photo below shows the deities: Virudhaka the Heavenly King of the South and Virupaksa the Heavenly King of the West
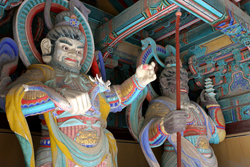 Image 3 -click here for map
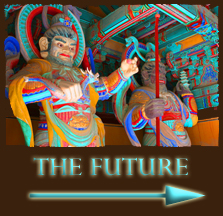
The following photo shows the deities: Vaisravana the Heavenly -King of the North and Dhrtarastra the Heavenly -King of the East
 Image 4 -click here for map
As you approach Boolgooksa you will notice a row of trees that obscure the front of the temple. The panoramic photo below shows the front of the temple through the trees and the panoramic photo below shows the front of the temple after you pass by the trees. (Use the scroll bar when looking at the panoramic photos)
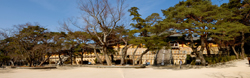 Image 5 - click here for map
The photo below a typical view of the Ch’ilbo and Yonhwa Bridge (far left), the Bumyongru pavilion where a ceremonial drum resides (middle) and Ch’ongun and Paegun Bridge (right front). The Bumyongru Pavilion mean “Brahman Bell Pavilion” it originally housed a Brahman bell but now contains a ceremonial drum.
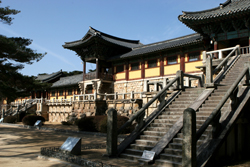 Image 6 -click here for map
Most photos of Boolgooksa show the temple shot from the southwest looking east to northeast whereas this photo below is rare due to it being a panoramic shot from the southeast looking west to northwest.
I incorporated a couple of items into the web-pages to help you get a idea of the direction in which the picture was shot as well as a proprioceptional feeling for the layout of the temple complex. You will notice the words “drum” and “fish” in many photos throughout the Bulguksa site. These words show the position of the ceremonial drum located in the Bumyongru and the carved wood fish hanging from the rafters in the Chagyongnu. Furthermore, you will notice the hyperlink stating “click here for map”. These maps show you a vector position of the camera in order to let you know where in the complex the photo was taken as well as what direction the camera is pointed
(Use the scroll bar when looking at the panoramic photos)
![]() Image 7 -click here for map
Image 7 -click here for map
Here is an over exposed photo to help you see the fish in the Chagyongnu. I copied the image of the back half of the fish and moved it down under the text “fish” to give you an idea of which way the fish is pointed.
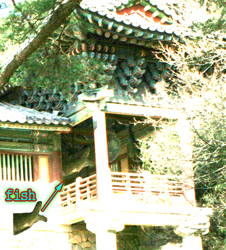 Image 8 -click here for map
The photo below shows a close-up from the second picture previous. Notice the top part of the drum is visible in the Bumyongru..
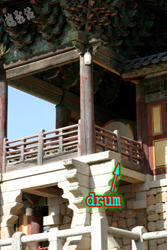 Image 9 -click here for map
The following photo is an eastern view showing the western face of the Taeungjon shot from the area just northwest of the Kungnakjon in which you can see its shadow stretched out in the foreground of this picture. After the next photo we are going to walk straight ahead up the stairs that you see in this picture to view the southern face of the Taeungjon and the Tabot’ap pagoda.
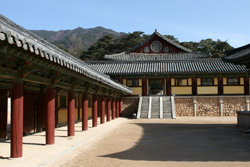 Image 10 -click here for map
This next picture is shot from the southwest corner of the Kungnakjon looking southeast toward the western face of the Bumyongru which houses the drum.
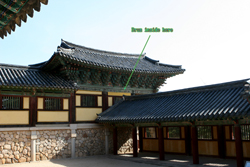 Image 11 -click here for map
I don’t know why I missed taking a photo of the Kungnakjon structure however; I did get a nice shot of the 9th century Seated Amitahba Buddha inside the Kungnakjon. (see below)
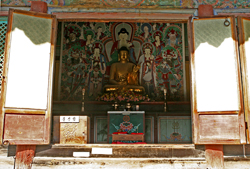 Image 12 -click here for map
We walked by the southern face then around the eastern face of the Kungnakjon (as I mentioned two pictures ago) and up the stairs into the courtyard of Taeungjon, Sokkat’ap and the Tabot’ap pagodas. The picture below shows an eastern view of the courtyard with the southern face to the Taeungjon in the left side of the picture and the Tabot’ap pagoda behind a small tope in the front part of this picture. Notice the fish is located back in the corner which is the Chagyongnu. (Use the scroll bar when looking at the panoramic photos)
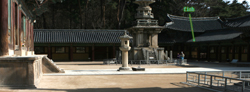 Image 13 -click here for map
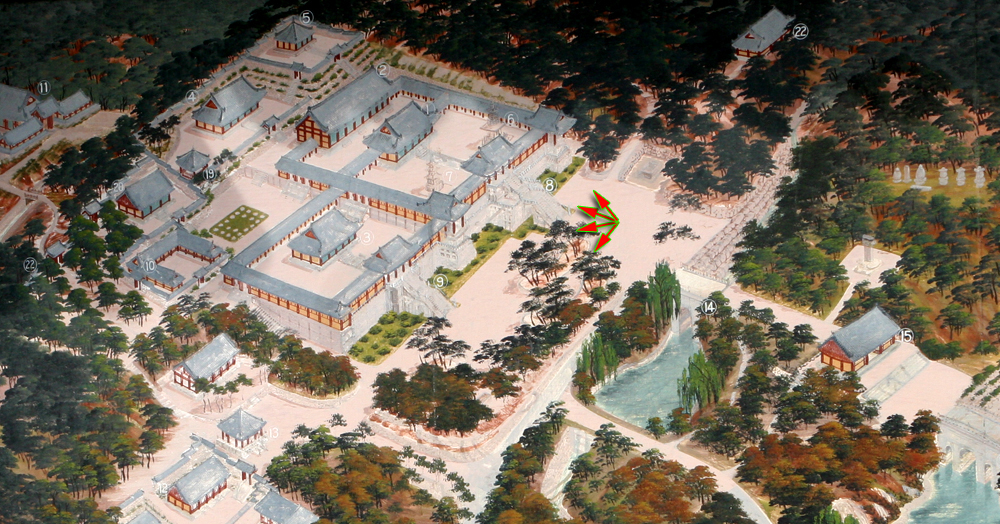
The following picture is not much different than the last except that it is a panoramic composed of 3 pictures to enable us to see the top most structure of the Tabot’ap and Sokkat’ap pagodas. Instead of the picture looking east as in the last picture this next one is looking southeast and next picture after this one is shot from the same spot looking south.
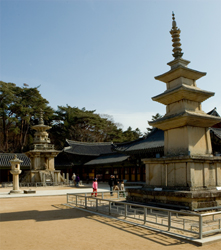 Image 14 -click here for map
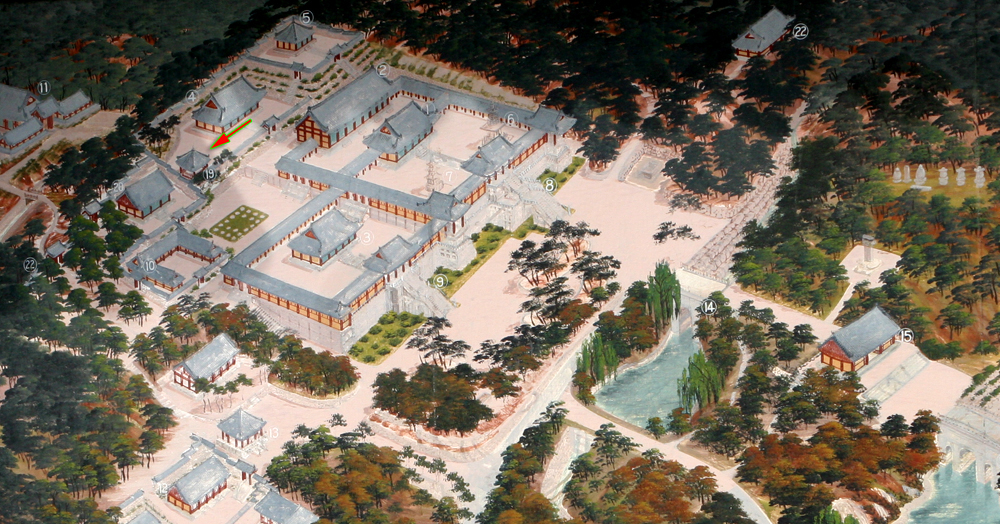
As I had previously mentioned this following picture is shot looking straight south down the arcade at the ceremonial drum in the Bumyongru. Actually I took two steps back from the last picture to shoot this one.
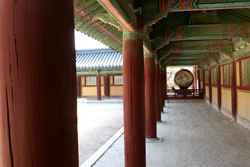 Image 15 -click here for map
The following picture is a detail showing the drum sitting on the turtle's back. There is a nice picture of the drum on the Wikipedia website. As I put together this website I asked myself, why did I not take more pictures of the drum. The answer to which I have arrived seems to indicate that I was so disappointed that there was not a bell in the Brahman bell pavilion that I snubbed the token drum that was placed there instead. Now I realized I should not have been so judgmental and had taken more pictures of the drum.
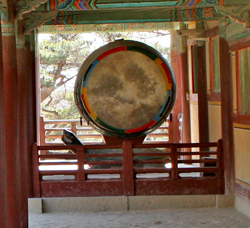 Image 16 -click here for map
The following picture is looking northeast at the Sokkat’ap pagoda and behind it you can see the southern face of temple Taeungjon.
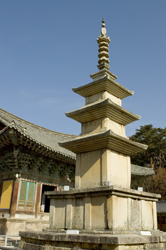 Image 17 -click here for map
I took three steps backward from the last picture and swing the camera to look straight east where you can see the fish down at the end of the arcade.
 Image 18 -click here for map
For the next picture I walked down the arcade about six or seven steps I swung the camera around to the left which pointed me northeast at the Tabot’ap pagoda I took two steps forward and took the shot.
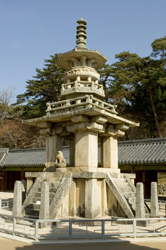 Image 19a -click here for map
If you look close at the western side of the Tabot’ap pagoda you will notice a seated lion. Originally there were four facing each of the cardinal directions. Two are presumed to be lost and the fourth one and only other one known is in the British museum in London. (I do not have a closer picture than this one so there is no link to a larger picture.)
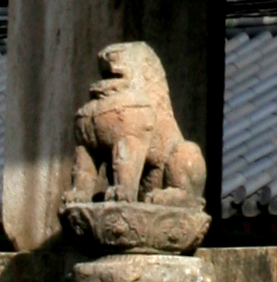 Image 19b -click here for map
I took three steps back under the eves of the arcade and walked down to the fish. Generally I see these fish as the swinging object that strikes a temple bell. I am now wondering if there was not once a bell in this Chagyongnu pavilion as well the Brahman bell missing in the Bumyongru. The next two pictures show the fish in detail.
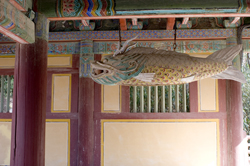 Image 20 -click here for map
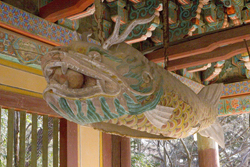 Image 21 -click here for map
I then stepped out away from the fish and swung the camera around to the northwest and shot the next picture of the southern face of the Taeungjon temple and on the left is the Sokkat’ap pagoda.
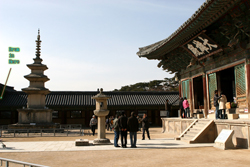 Image 22 -click here for map
The following picture is a better view of the southern face of the Taeungjon temple and the corresponding stone lantern incense burner that I commonly refer to as a tope.
Inside the Taeungjon are three Buddha’s; the larger is the Sakyamuni flanked by Miruk (Maitreya) and Galla-bul (Dipamkara)
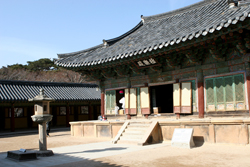 Image 23 -click here for map
To the north of Kungnakjon (heavenly temple) there is an arcade which runs east and west and separates the courtyard of Kungnakjon and the courtyard of the Pophwajon site. The following picture is shot looking east along that arcade. Poking up through the top of the arcade in front of us, you can see the top of the Taeungjon temple on the right side of the picture and the top of the Musoljon temple on the left side. (Use the scroll bar when looking at the panoramic photos)
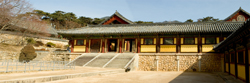 Image 24 -click here for map
The following picture is a panoramic that I shot from the same spot as the last picture however, it spans from due east all the way around to the northwest showing us the entire Pophwajon site. (Use the scroll bar when looking at the panoramic photos)
![]() Image 25 -click here for map
Image 25 -click here for map
In the middle of the last photo you could see some stairs leading up into an arcade. I followed those stairs which lead me east along the ‘backside’ north side of the Musoljon temple to a point where I could look south and see the arcades that leads to the fish. The following photo is looking straight south towards the front of Bulguksa.
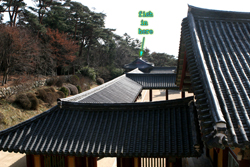 Image 26 -click here for map
I took ten steps back through the gate and shot the following picture looking straight south again down the arcades. It is basically the same shot as the last picture.
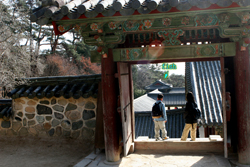 Image 27 -click here for map
From the spot of the last picture I turned 90 degrees to the right I walked back toward the west to get better light for the following picture of the Kwanumjon temple which houses the Avalokitesvara the bodhisattva of mercy. Unfortunately I was not allowed to shoot a picture of the Buddha which was a shame since this temple was my favorite of Bulguksa. The painting behind the Buddha is stunning. The photo that I shot is looking northeast.
 Image 28 -click here for map
The following picture is shot looking north into the doors of the Kwanumjon temple.
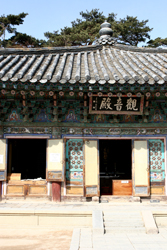 Image 29 -click here for map
Just west of the Kwanumjon temple there is a small pavilion in the garden of Pirojon temple that houses the Sarira tope. I understand that inside the tope, a chamber contained the ashes of many priests or a queen until it was taken by the Japanese and emptied. The stupa was eventually returned and now sits in the pavilion shown in the following picture.
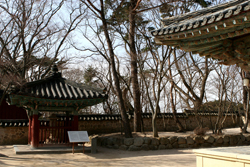 Image 30 -click here for map
The following picture shows not only the some of the structure of the Sarira stupa but also some damage incurred over the years. There are four carved reliefs showing different Buddhas and Bodhisattvas. The cap is hexagonal while the middle structure is a bulging square and the pedestal is an octagonal lotus motif.
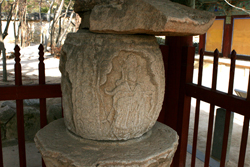 Image 31 -click here for map
The next two pictures are of the bell pavilion located in the far western part of Bulguksa.
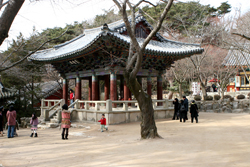 Image 32 -click here for map
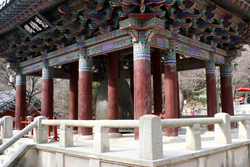 Image 33 -click here for map
The last picture is of the map overview of the entire Bulguksa campus.
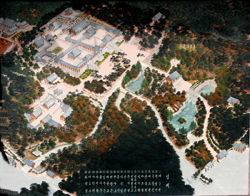 Image 34
If you have any questions or comments I would be happy to answer them. You can contact me by the link below.
 |
 |
 |
 |
||